A Brief Overview
I run a fitness studio and want to display my public and private class schedules and training sessions on my website. What is the best WordPress plugin to accomplish this?
As you already know, the first step to enhance your website’s functionality is downloading and activating a premium WordPress plugin!
Even a free plugin allows you to fetch events from public calendars. However, to access events from a private calendar, you need a premium plugin.
The plugin not only simplifies the OAuth authentication process but also lets you display and customize your calendar effortlessly, making it much easier to manage and integrate with your website.
There are plenty of WordPress plugins out there for displaying calendars on your website, but if you’re looking for something straightforward and easy to use, Simple Calendar’s Google Calendar Pro addon is the way to go. BECAUSE simplicity is the key!
With Simple Calendar’s free plugin, you can easily show public Google Calendar events on your website. But if you want to display private events and enjoy more customization options, upgrading to our Google Calendar Pro plugin is your next step.
Here we discuss how to integrate one of Simple Calendar’s best-performing add-ons, i.e. Google Calendar Pro (aka GCal Pro).
I have laid down the detailed steps to utilize Google Calendar, implement customization features, and create events in this blog. So, stay until the end!
Learn More About Google Calendar API
Google Calendar API adds Google Calendar functionality to your website. It allows you to display, create, and manage calendar events and other calendar-related objects like access controls on your website.
You can create events, and recurring events, synchronize resources, and apply push notifications using this API.
Individuals and businesses alike can benefit from Google Calendar API.
- With this API, you can add, update, and delete events without manually entering details in multiple places. SAVES YOU A TON OF TIME, right?
- You can provide real-time updates of events to your visitors. Businesses leverage this API to schedule appointments, classes, or events.
- You can control who sees and edits your calendar. It helps retain privacy and ensures access to only authorized individuals.
HOWEVER, you may find it a NIGHTMARE to work directly with APIs being a non-tech guy! Thankfully, you’re blessed with WordPress plugins that ease the process by integrating Google Calendar API for you.
How Does It Work?
The Google Calendar API allows applications to interact with Google Calendar on behalf of a user
Step 1: Authentication
The application needs authentication with Google via OAuth 2.0. With this, the user grants permission to the application to access their calendar data.
Step 2: API Requests
Now, the application sends API requests to the Google Calendar API. These requests are sent to perform different actions like reading, creating, updating, or deleting calendar events.
Step 3: Handling API responses
The application handles responses to fetch events, create events, update events, or delete events. The API responses contain data in JSON format, which the application can parse and use to display or further process.
Step 4: Syncing
The API allows for the synchronization of events. Thus, applications keep the user’s calendar updated with minimal delay.
Step 5: Notifications
Applications can set up notifications to receive updates about changes to the calendar, such as new events, updates, or deletions.
Google Calendar Pro Addon: Install and Activate
Google Calendar Pro is one of our top-notch add-ons for Simple Calendar that lets you display both public and private Google Calendars on your website.
GCal Pro Features
- Sync events from public and private Google Calendars.
- Use Google Calendar colors to highlight events.
- Show attendees’ names, avatars, and RSVP status for any public or private event.
- Display information about the event organizer.
- Provide a list of attachments with links to their sources.
- The OAuth-enabled connection between your site and Google.
A Step-by-Step Guide to Install & Activate GCal Pro
FIRSTLY, go through these instructions to install and activate our premium add-ons!
You can also skim the steps below:
Step 1: Download the add-on zip file(s) from your purchase email.
Step 2: Log in to your WordPress admin
Step 3: Go to Plugins > Add New.
Step 4: Click Upload Plugin and choose the downloaded zip file.
Step 5: Click Install Now and then Activate Plugin.
Step 6: Repeat for any additional add-ons.
Step 7: Enter your add-on license key(s).
Note (for Safari users): If a folder is saved instead of a zip file when downloading, try Control-click or right-click and select “Download Linked File”. Plugins must be in a zip file format to upload to WordPress.
Activate license key
To receive updates and support, activate your add-on license key(s):
Step 1: Copy a license key from your purchase email.
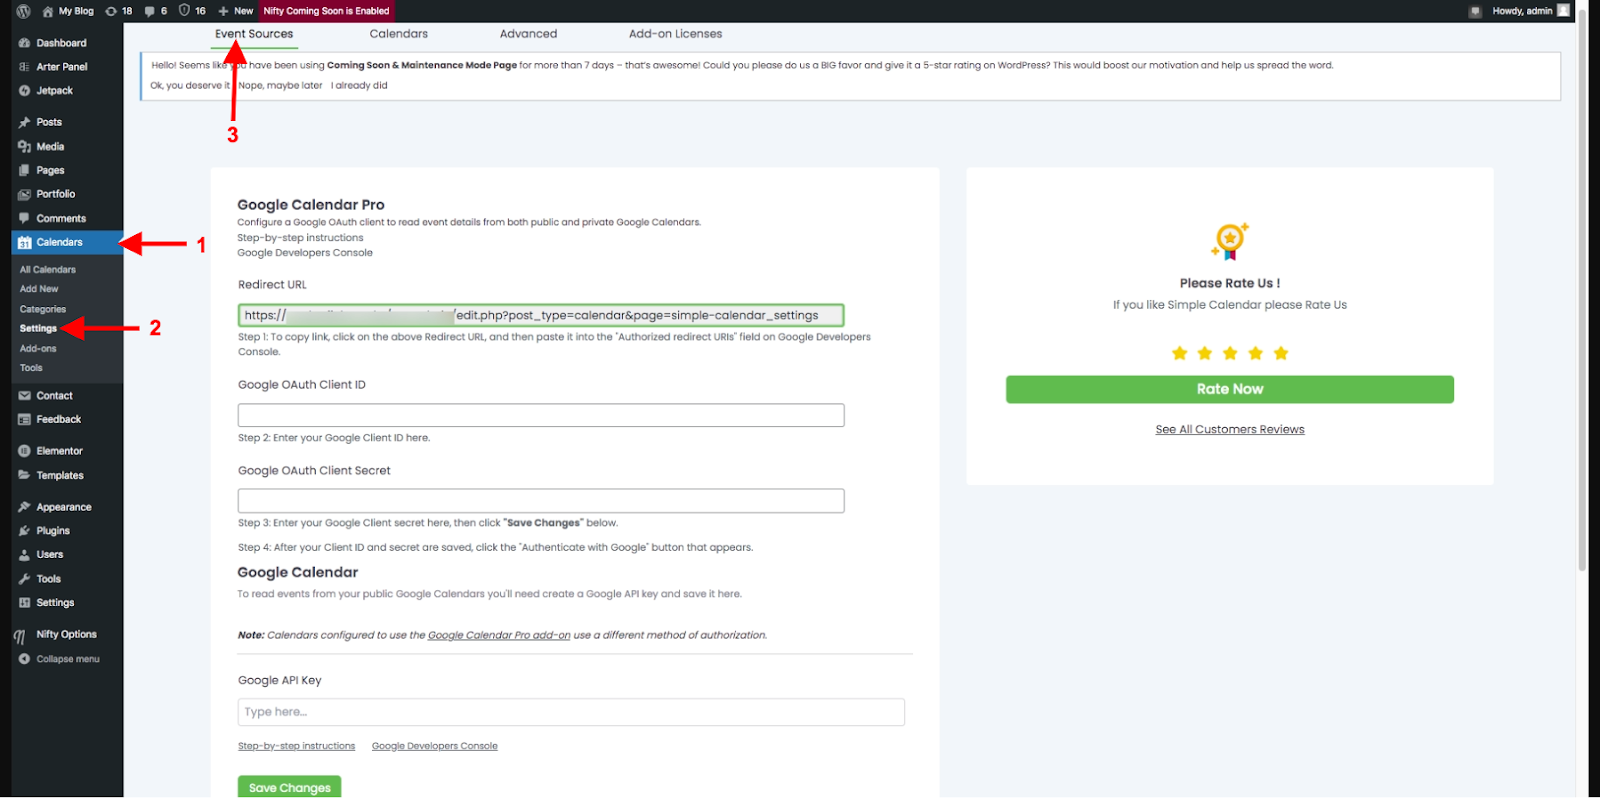
Step 2: Go to Calendars > Settings > Add-on Licenses in the WordPress admin.
Step 3: Paste the license key and click Activate.
Step 4: Repeat for additional add-ons.
Leverage GCal Pro Addon Using Google Calendar API
Authenticating Via Simple Calendar
Although Simple Calendar allows seamless integration of Google Calendar into the WordPress website, it still involves certain time-consuming steps. And, this is where OAuth Helper feature comes into play! You will only go through the following 3 steps if you authenticate via Simple Calendar.
Step 1: Activate the plugin
To use this feature, you must install and activate our premium add-ons WP FullCalendar or Google Calendar Pro from here.
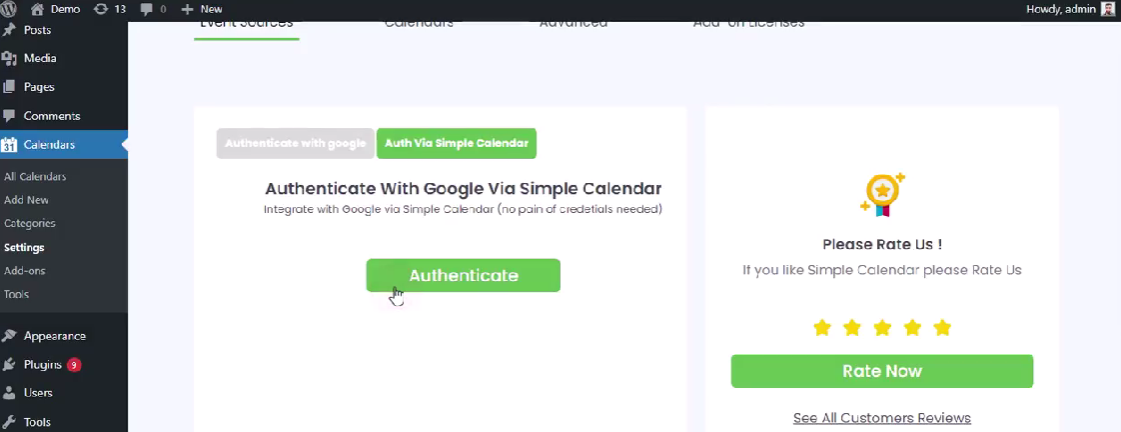
Step 2: Authenticate
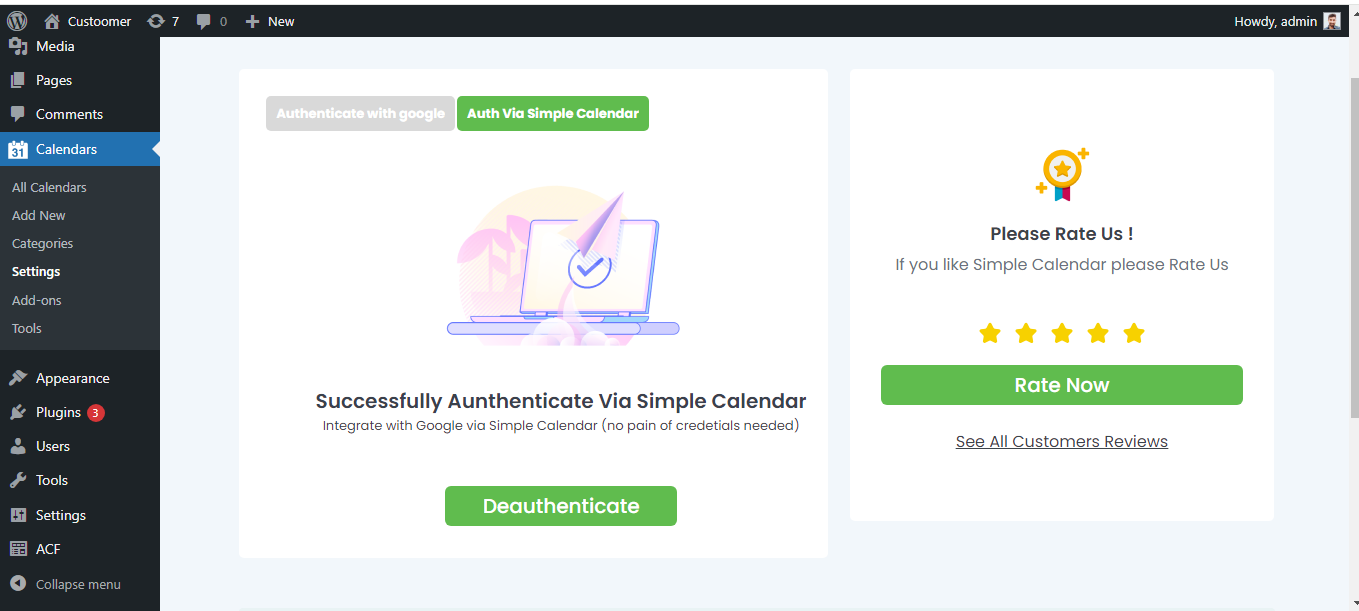
It uses refresh tokens. They automatically acquire new access tokens in the background so that you won’t have to re-authenticate every time your access token expires.
Authenticating Via Own Credentials
Given below are the steps you need to follow if you choose ‘Authenticate with Google.’
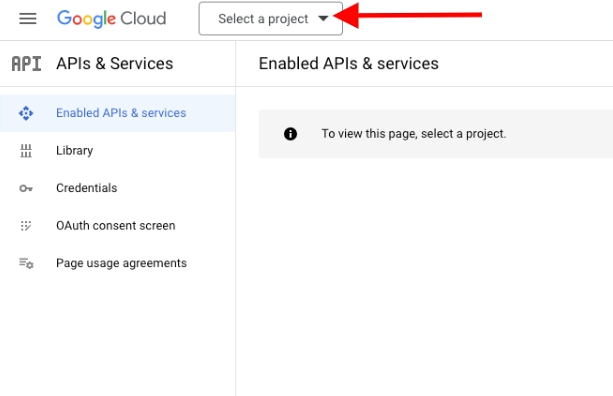
Step 1: Open Google Developers Console.
Step 2: Click Select a project from the drop-down menu.
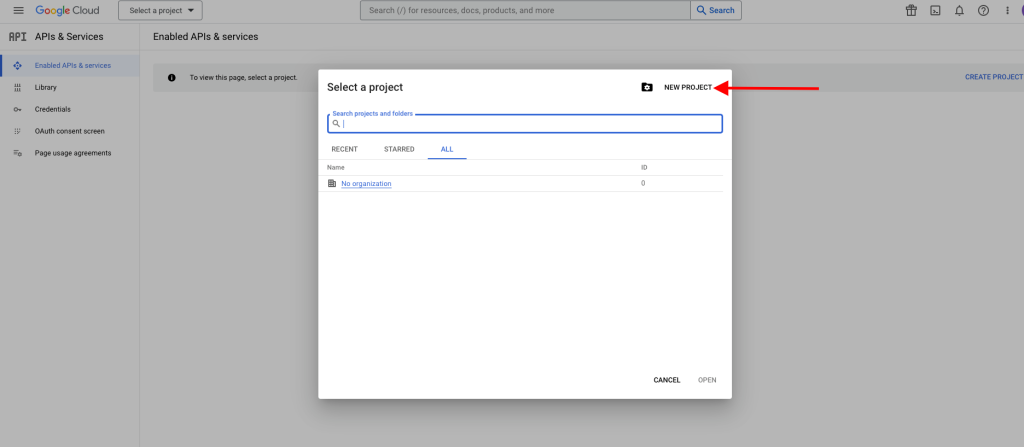
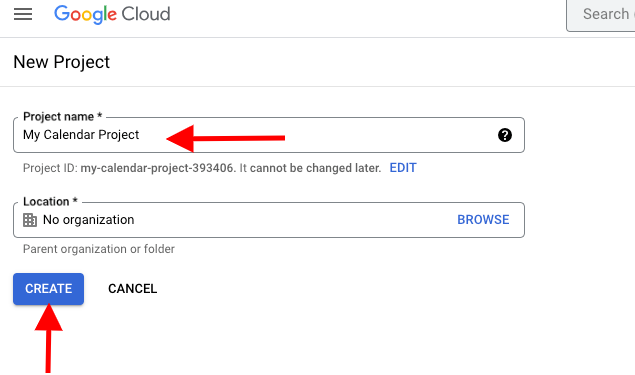
Step 3: Create a New Project.
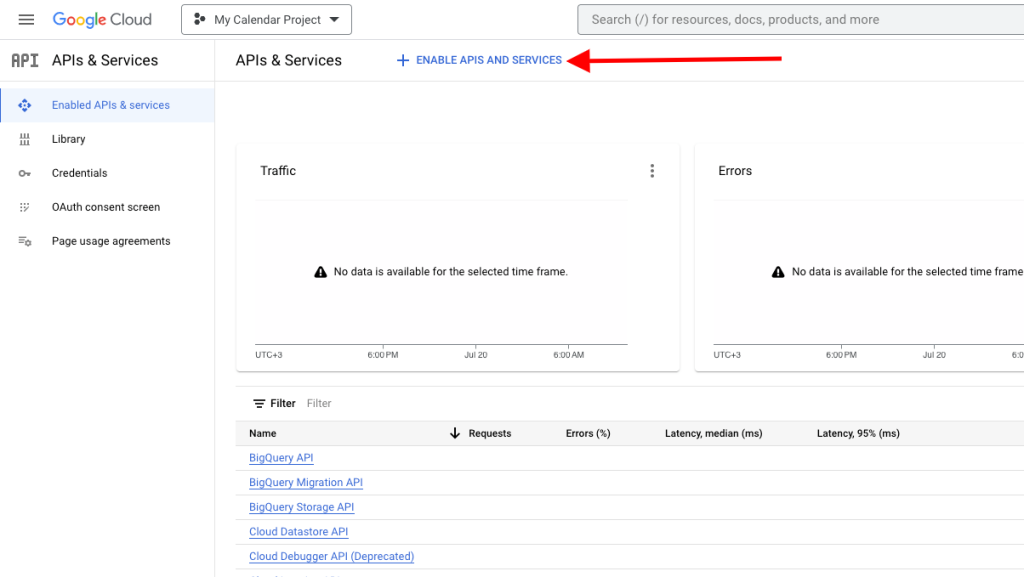
Step 4: Click the Enable APIs and Services link from the Google Developers Console dashboard.
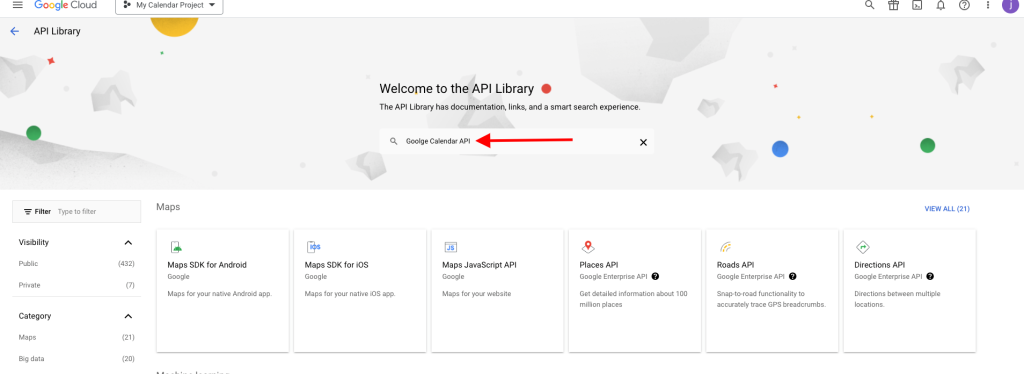
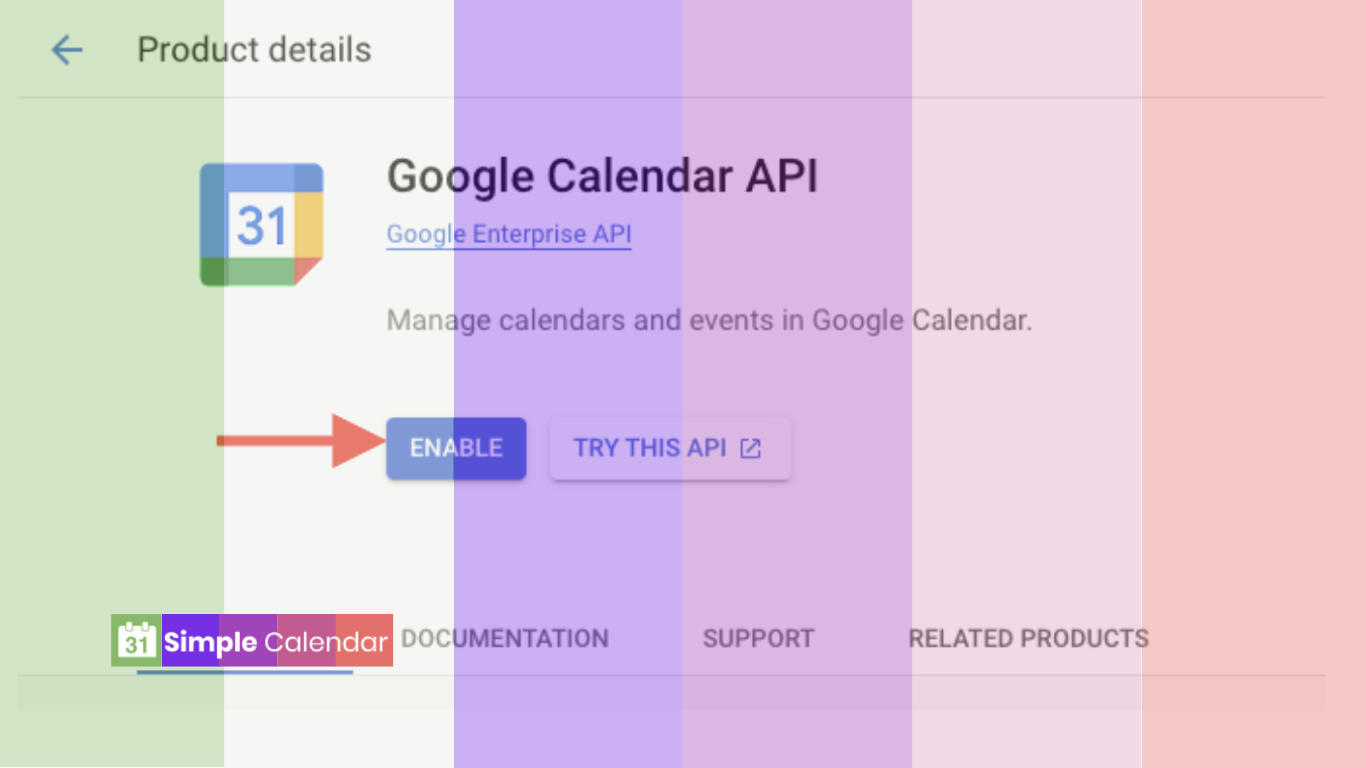
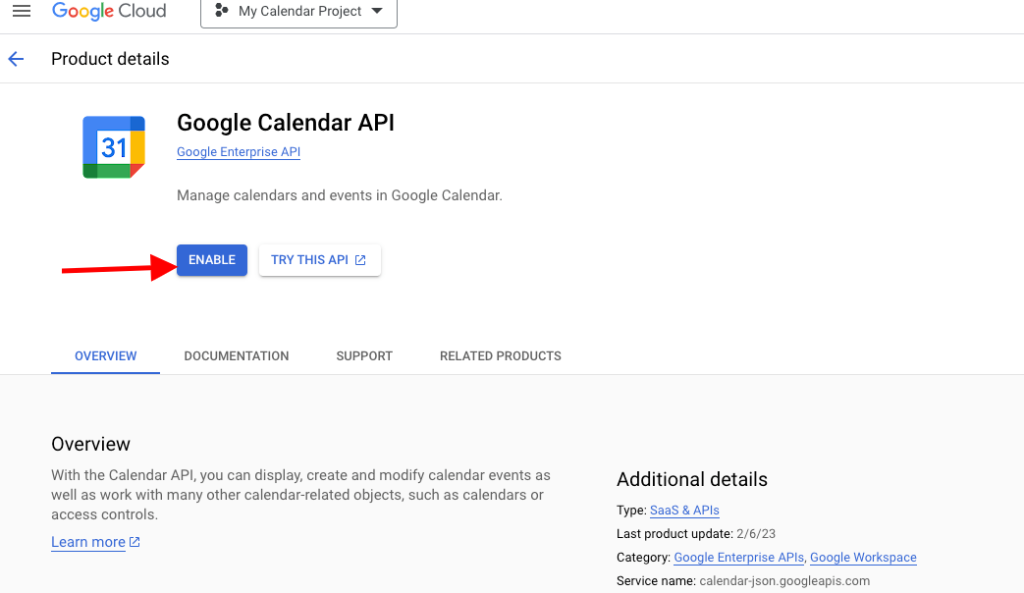
Step 5: Search for and enable the Google Calendar API.
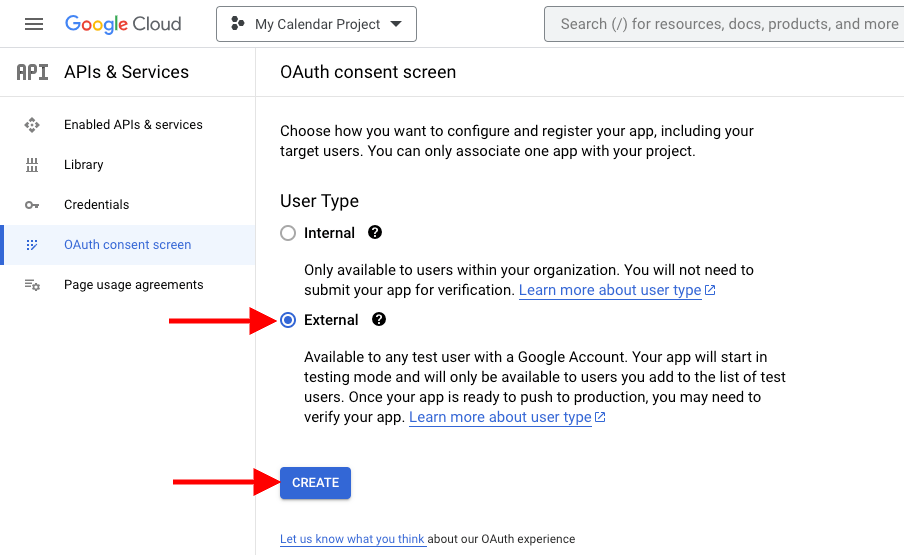
Step 6: Configure the OAuth consent screen under the Credentials tab.
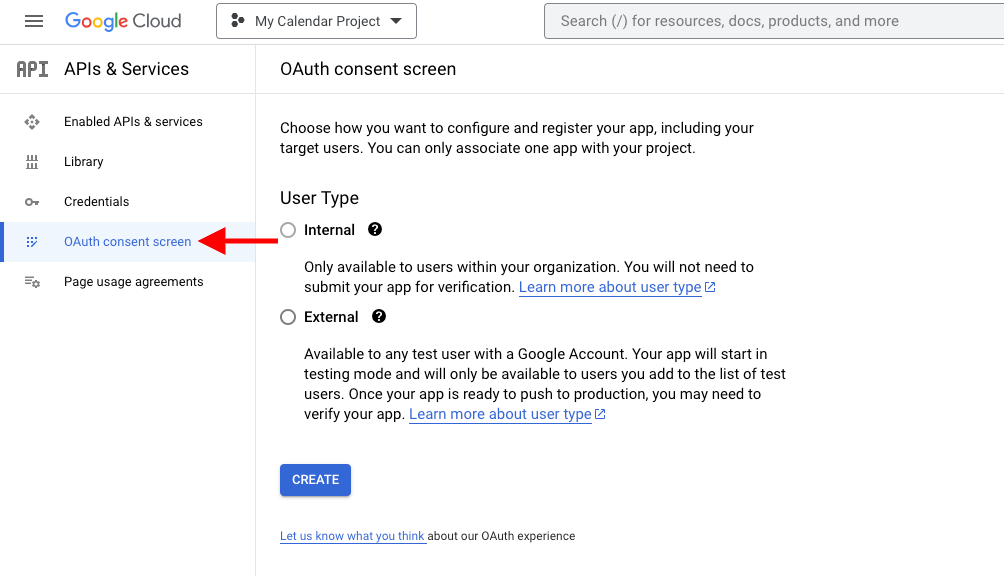
Step 7: Select External for the user type and click Create.
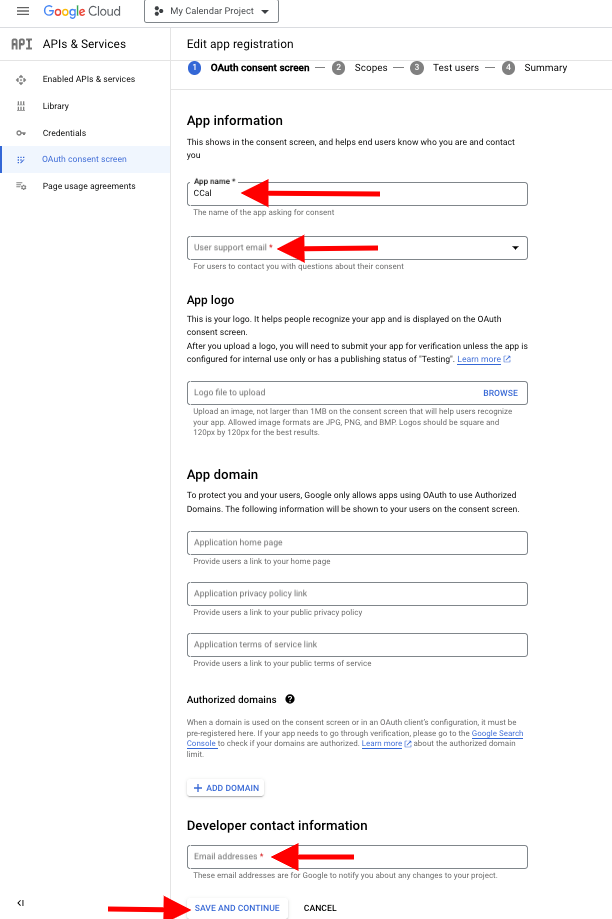
Step 8: Enter the App Name (optional), User Support Email, and Developer Contact Information, then click Save.
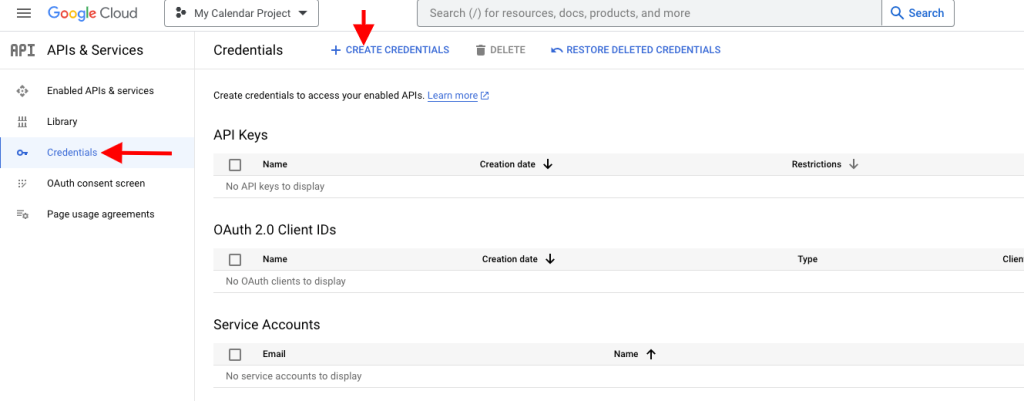
Step 9: Click Create Credentials under Credentials in the left-hand menu.
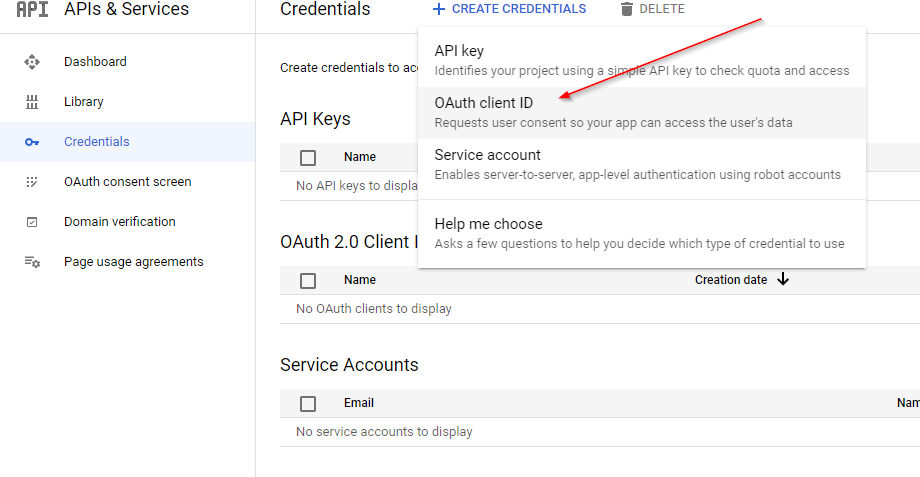
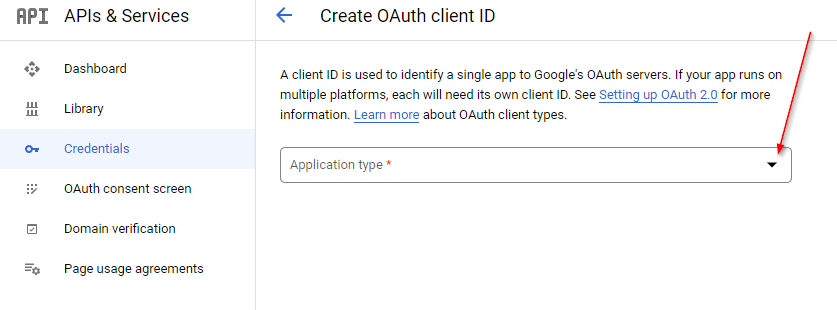
Step 10: Select OAuth Client ID from the drop-down menu of Create Credentials.
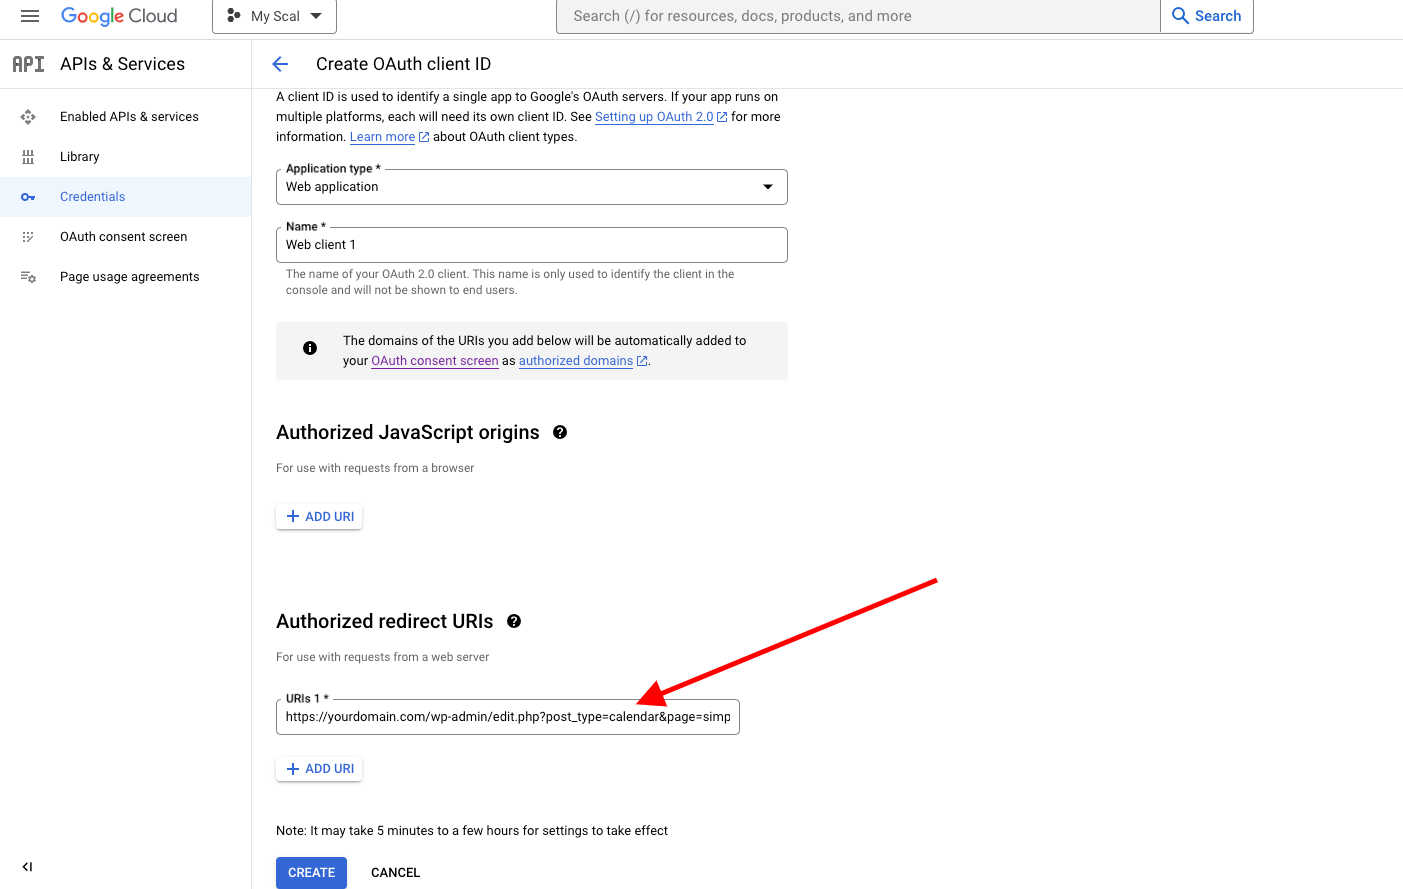
 Step 11: Select Web application as the Application Type.
Step 12: Enter the application name (such as Simple Calendar Client ID) and the Authorized redirect URI.
This is an auto-generated URL that exists under the Redirect URL field on your WordPress dashboard. You need to copy and paste the Authorized redirect URI on Google Console to create credentials.
Hit the Create button once it is done.
Note: The settings may take up to 5 minutes to a few hours to take effect.
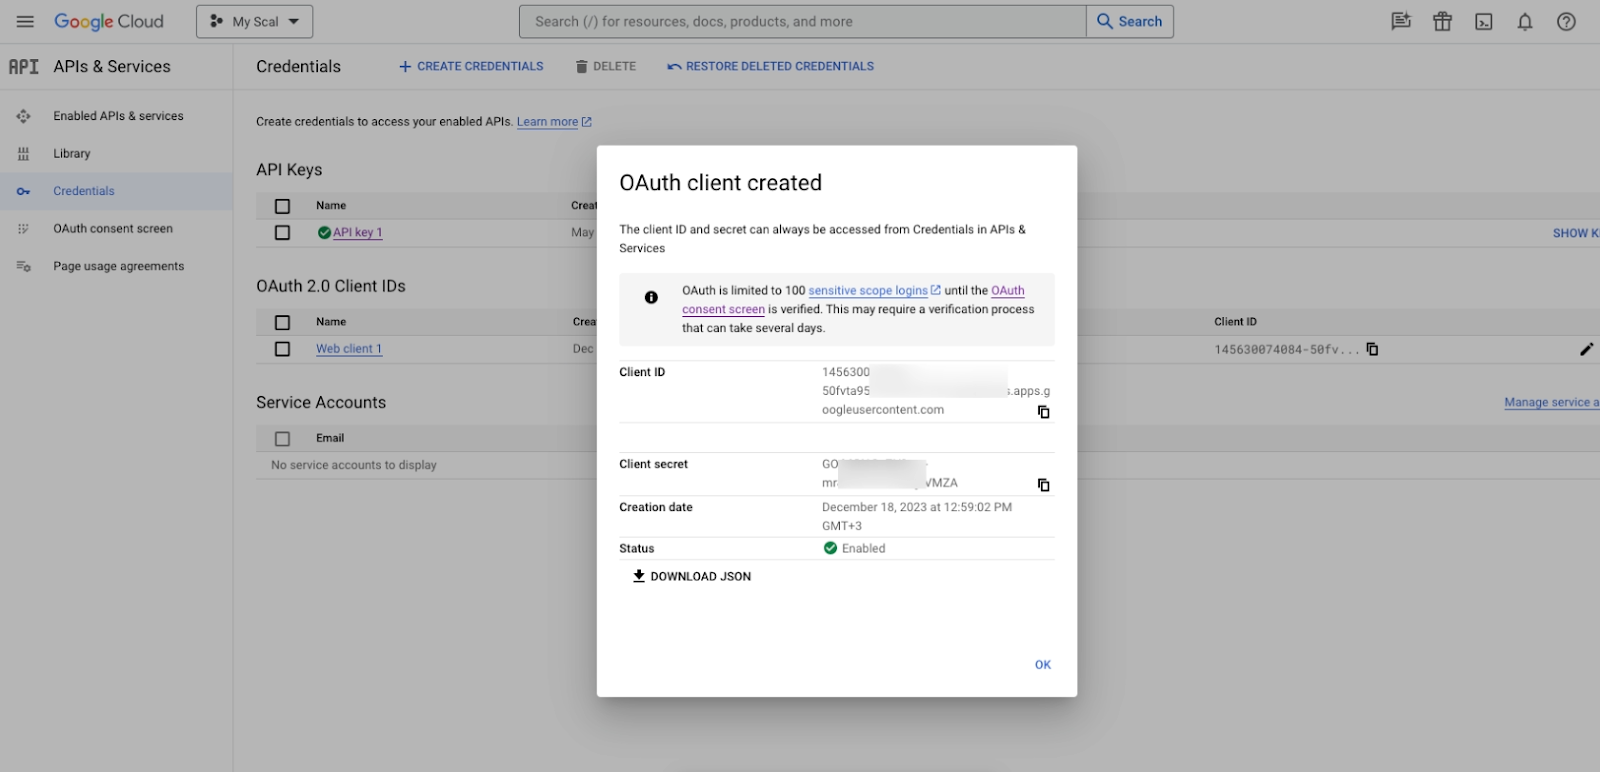
You should now have a Client ID and Client Secret. You can view your client ID and client secret key once again on the underlying Credentials screen under the OAuth 2.0 client IDs tab if you need to refer to them later.
Note: Handle your client credentials very carefully. Do not share with any unauthorized users.
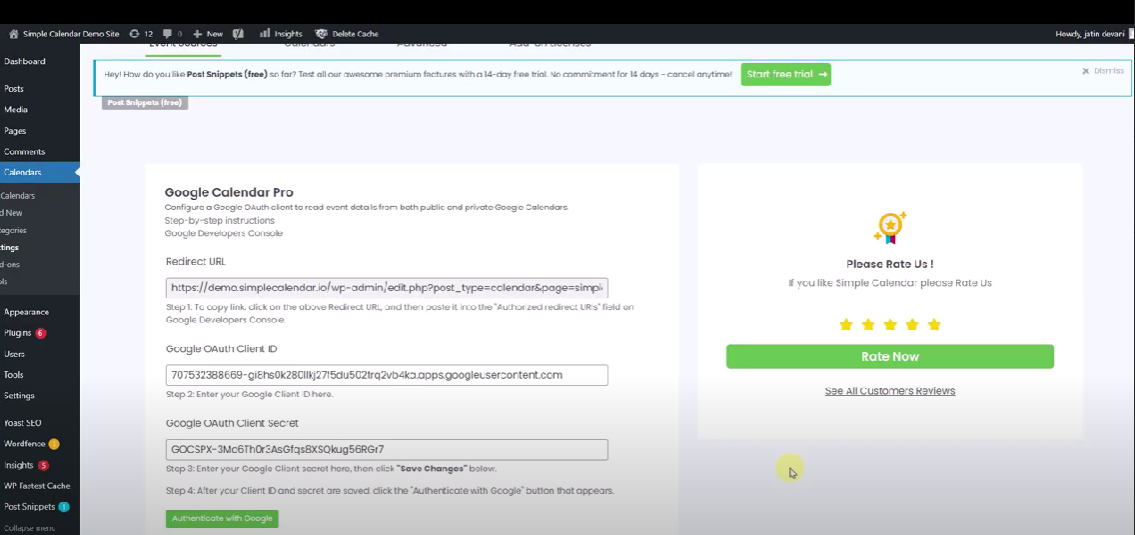
Open the Google Developers Console page in one tab, and your WordPress admin page in another.
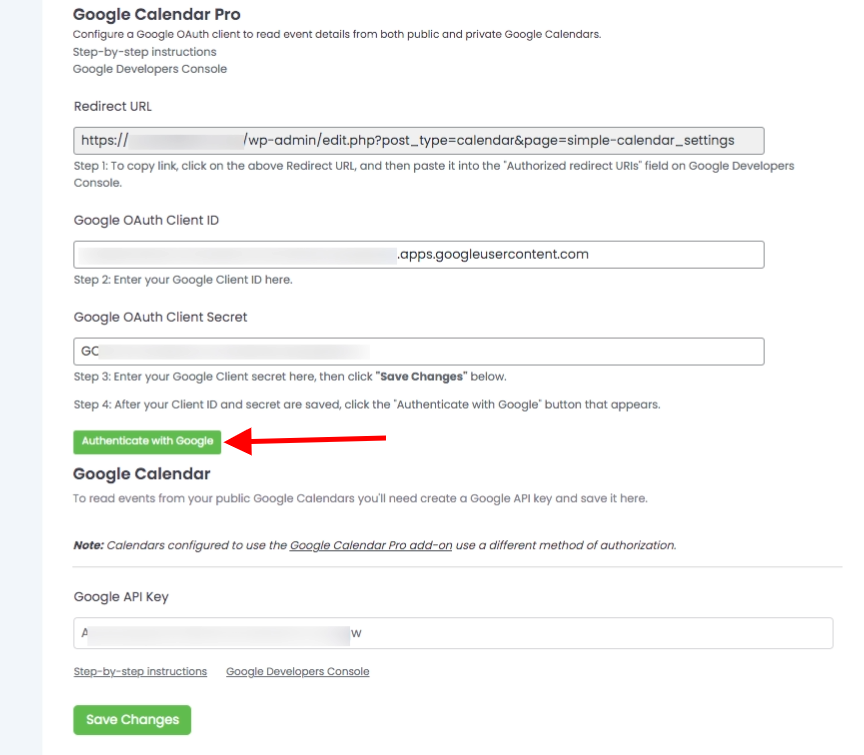
Go to Calendars> Settings within your WordPress admin and paste the Google Client ID, and Client Secret values from the Google Console.
Save Changes and then click the Authenticate with Google button.
Note: The verification of the app is crucial to maintaining a secure and trustworthy app-service integration.
You can now proceed with the authentication process and check all selections as shown below to Continue.
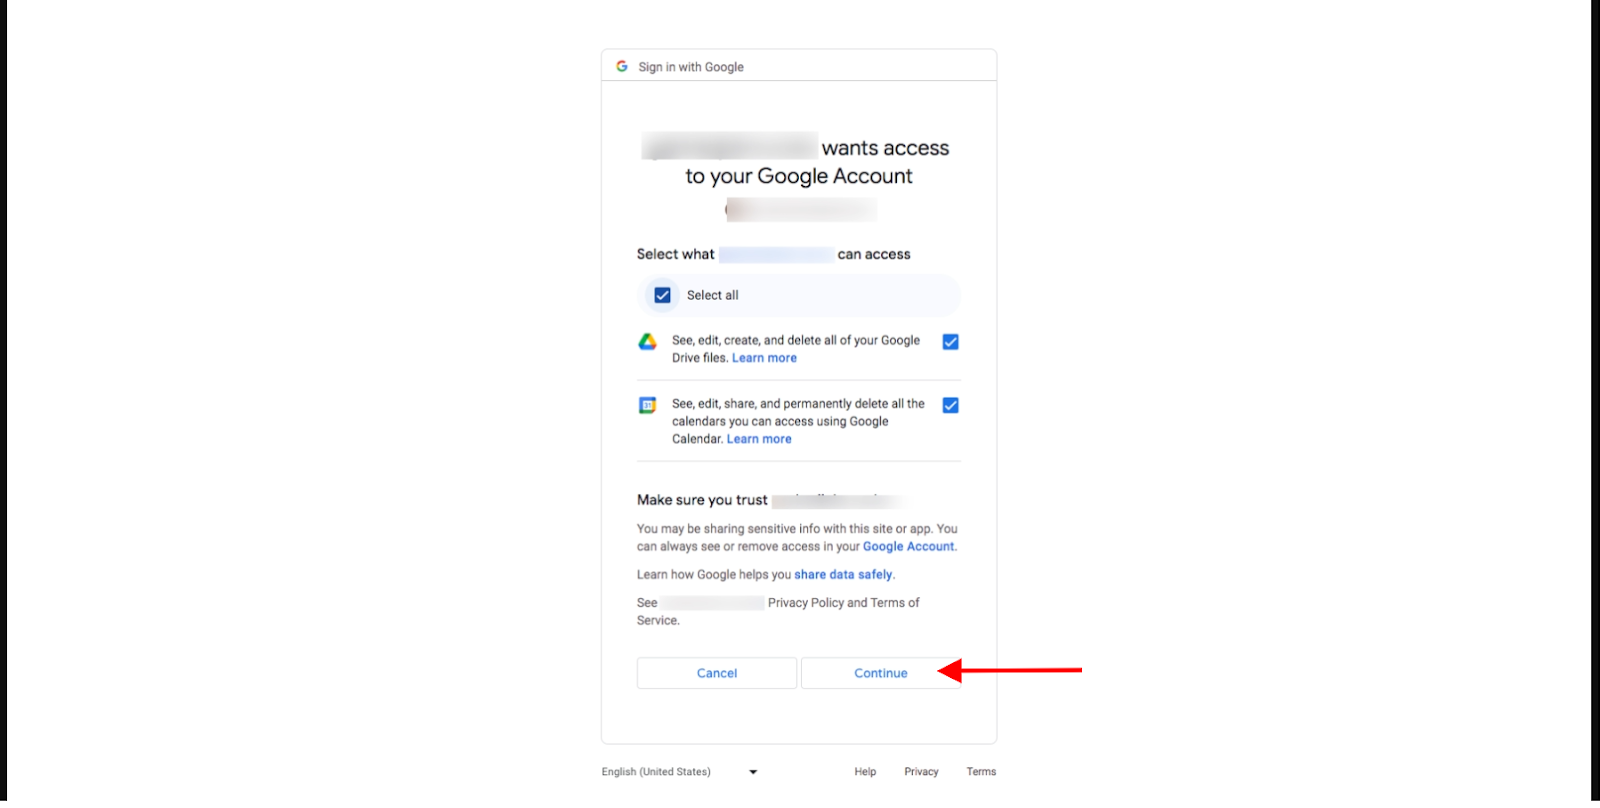
Note: You must log into Google first if you aren’t already. Allow Simple Calendar to access the calendars of the currently logged-in Google user.
See Google Calendar Pro in Action
As we wrap, we are hopeful that you understand how simple and effective your GCal Pro addon is designed to help you easily manage both public and private events.
Get a sneak peek at what Google Calendar Pro can do! Explore demo features of private events, advanced customization options, and more. Ready to experience it for yourself?
If you’re running a small fitness studio, a local community center, or even a training school, displaying both public and private class schedules on your website is essential. Simple Calendar’s Google Calendar Pro plugin is designed just for you! It not only simplifies the process but also offers top-tier customization and support. Whether you’re organizing classes, meetings, or events, this plugin ensures everything looks professional and runs smoothly.